
So, you want to write? And you’re looking for a few tools to make your writing easier, better organized or adapted for a new publishing format?
I’ve written and published over 300 blogs, articles and book chapters over the last several years. While the tools aren’t as important to me as the time, attention and process I put into writing, I’ve come to find good tools can empower and smooth out several aspects of my research and creative process.
These are the tools that put me into writing zen!
Whether you are working on the next great American novel, creating a work report, penning a poem, or just striving to get a shareable blog post done, here are my favorite tools for writing for writers.
NOTE: This list is Version 2.0 (circa August 2019). If you are interested in my writing tools from early 2018 (which included Ulyssess and Evernote), see Version 1.0 of this post.
My Core Writing Tools
These are the true workhorse tools for my writing and creative process: The Archive, Typora, and Bookends.
These tools are also at the heart what I call The Plain Text Life, a setup of plaintext files I use for note-taking, writing and life organization and tracking my notes it too.
The Archive: A “Smart Notes”-based Notes Organizer
Solves: Tag-based system for organizing and connecting together all of the notes I use in learning, writing and other creative projects
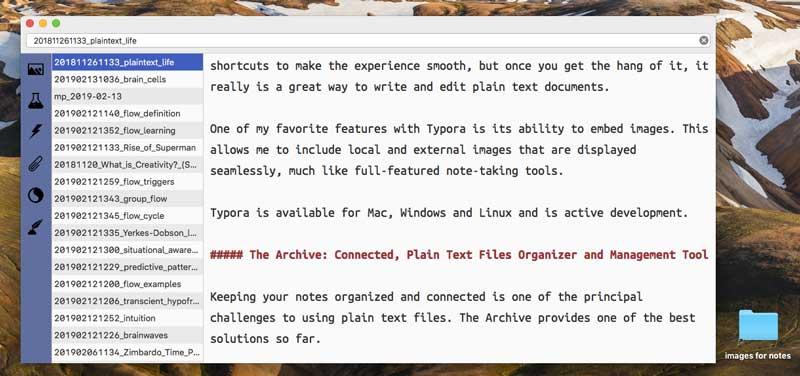
The Archive has been my go-to tool for managing and organizing all of my notes and creative drafts for awhile. Inspired by the book, How to Take Smart Notes, I decided to migrate off of Evernote and started using The Archive along with Typora for nearly everything I write or take notes on.
Unlike many other note-taking and writing apps, The Archive acts more like a file and tags organizer on-top of a simple text editor. All of the files are separate, plaintext markdown file.
By default, The Archive has a nice look and feel. Very writer-ly. It also has adjustable themes and fonts if it’s not to your taste.
To give you a quick orientation, on the right is the main editor panel for writing. In-between, on the left is a list of files. This could be a list of all files or a sub-list of files according to a tag or cross-linked. Subtly at the very top is a search bar where you can look up file names, tags, etc. On the far left with icons are customizable buttons that you can use to segment your files. For example, I have a button for my morning journal tag, one for my summary notes, and two others for working and general drafts.
You type notes in markdown and, according to the syntax, it provides some general highlighting. Additionally, anytime you put a hashtag gets converted into a link. When you click those tag links, it does a search on files with that tag and displays them in the left files panel.
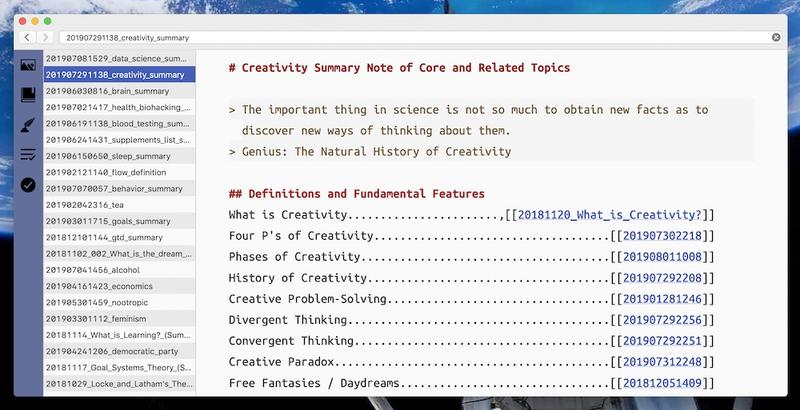
The real power of The Archive is thinking about it like a Wiki. In fact anytime you create links between things it becomes a wiki. So, like in a Wiki, when you create links between notes using double brackets, The Archive makes it simple to crosslink between different notes. This ability to link between multiple notes make it a powerful framework for an interconnected knowledge network.
Here is an example of a summary note on creativity, which links to multiple individual notes I have created on this topic:
A discussion on how to organize your notes and writings is a bit outside the scope of this post, but here is a quick example of how I use tags in my creative writing workflow. Basically, my primary tags are: draft-idea, draft-working, draft-working-focus, draft-publishable, and Blog-Published. I use these five tags on on drafts, which cover my workflow process from idea stage to draft stage to publishing. Depending on how you want to draft, write and publish, you can setup an appropriate tagging convention for your needs. Similarly there is no real limits or forced conventions on tagging overall in The Archive.
For me the main features I enjoy about The Archive are its clear interface for typing and editing markdown and its smooth interaction between notes using wiki-style links and tags. The segmented lists make it easy to quickly see what notes you have on a topic or tag.
The main limitations I find with it are lack of inline images and inability to have multiple windows open at the same time. Fortunately, The Archive provides a shortcut and option called “Open with External Editor,” which allows you open files a separate editor and largely solves both of these limitations for me.
The Archive is available for Mac with a long free trial period before a one-time fee, which covers many features to come.
Typora: Best Looking Markdown Editor on Mac

Solves: Minimalist Markdown Text Editor with a Clean Interface, Embedded Images and Multiple Export Options
There are awful lot of markdown editors out there today on any and all platforms. Typora in my opinion is one of the best looking and has a very smooth user experience.
Typora came to my attention for two features. First, unlike other editors, it bridges the line between raw plaintext and a WYSIWYG (“What You See Is What You Get”) editor. So, you can see images inline and styles show up as you write, instead of in a separate window or when you export. Underneath though it’s all just markdown text.
Second, Typora stands out in terms of its layout and typography. It’s not quite as coder-oriented as many other markdown tools. Basically, it looks like any other modern Mac application with nice fonts, margins and spacing.
Since it isn’t pure text, you’ll need to learn a few shortcuts to make the experience smooth, but once you get the hang of it, it really is a great way to write and edit plain text documents.
One of my favorite features with Typora is its ability to embed images. This allows me to include local and external images that are displayed seamlessly, much like other full-featured note-taking tools.
Typora is available for Mac, Windows and Linux and is under active development.
Bookends:
Solves: Find and Store Research References, Generate a Formatted Bibliography
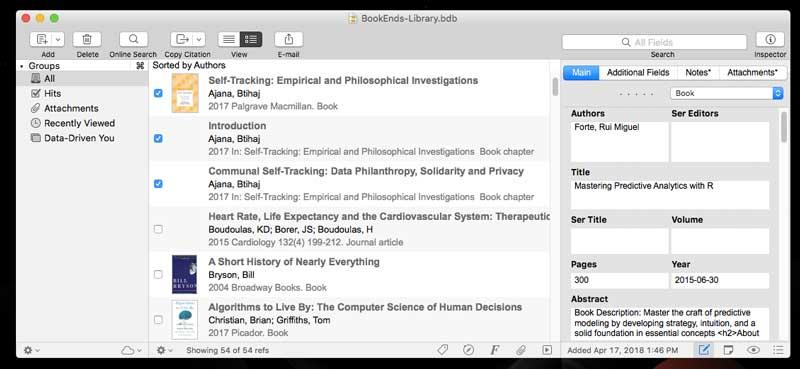
Bookends is an example of reference management software. Its primary users are academics and researchers, who need to collect and organize their research and to create properly formatted bibliographic information for their publications. There are a number of options in this software category like Papers and Zotero, and plenty of fans of each. After surveying a few tools, I elected to use Bookends as my reference and bibliography manager, and, in spite of a few initial hiccups, I’ve been really happy with it.
The primary purpose of Bookends is to help you keep track of reference and citation information on academic papers and books as well as internet sources. Since I read a good amount of formal research articles and books, I dump that info into Bookends. Additionally, when there is a PDF, I attach it to its reference too.
It’s a bit tedious getting started (especially if it’s been over a decade since you left graduate school), and you’ve forgotten how to create a work cited page. Fortunately, Bookends provides default fields so you know what to collect on each article or book. It also has a few nice automation tools. For example, you can import complete book references from Amazon and article and journal citations from Google Scholar, pubMed, or several other academic databases. This can really speed up setting up your initial database of citations.
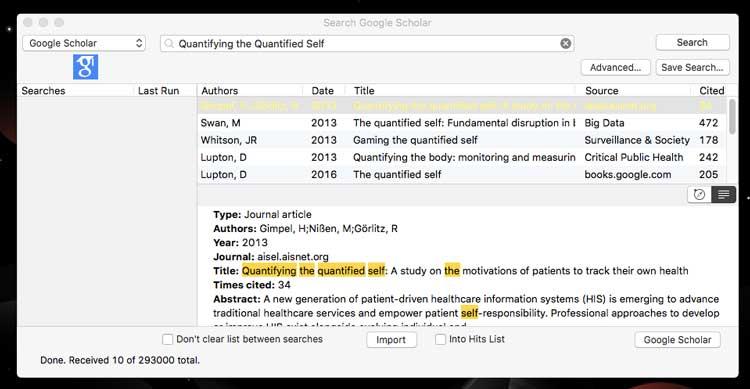
Often what I do is use Google Scholar for the search part and then save and export my citations from there. It’s easy to then bulk import. them into Bookends.
Once you have added your references, Bookends makes it easy to then export a properly formatted bibliography or works cited. Simply select the articles you are using and then export it. Bookends provides nearly a dozen standard formats by default, and it’s easy to create or adapt your own.
Additionally, Bookends integrates with any number of text editors and tools, so you can create smart references. This makes adding references inside the text you are writing easy. Basically you copy the reference out of Bookends and then paste it as special tag into your text editor. Finally, when you need to render the completed manuscript, the text you wrote is combined with the references you’ve added from Bookends to generate the final text. Personally, I prefer using the full formatted citation, rather than a smart reference.
Since using Bookends for nearly a year, my references have grown from a few dozen to over 2000. This is not something I could manage in my head or without a tool like this. Having a reference manager tool has been extremely helpful in my learnings and for science-based writings online and in book form.
Bookends might not be a tool for all types of writing, but if you do academic and research style writing, a reference manager is a must-have.
My Design Tools for Writing
I also dabble in a bit of design work. Design considerations go a bit beyond this post, but since I typically create graphics for everything I publish, it’s worth mentioning the tools I use to make it happen.
I’ve used lots of different design tools over the years, but ironically one of my favorite tools to create quick graphics and blog covers is with a presentation app, like Keynote for Mac. These tools are specifically designed for creating slideshows and presentations, but they also work great for throwing together a few images, graphical elements and text too.
Additionally, while they are a bit “old school,” I also use Adobe Photoshop and Illustrator to help me in creating graphics and editing photos for my writings.
Looking back, I’m definitely glad I invested a couple months of study time to become proficient in basic design in general and with a tool like Photoshop. These basic designs skill mean that I can create decent looking images for my needs, and I‘ve saved a lot of time and money too.
Supplemental Tracking and Productive Tools for Writers
While not critical for how and what I write, here are a few more tools that help me to track my writing, to stay productive and organized while writing, and to improve and automate my writing workflow.
Tracking My Word Count with Word Counter for Mac
![]()
I’m a bit of an obsessive tracker, and I use a lot of tracking tools. I use two different ways to track my writing itself. For my typed words per day, I use Word Counter. It’s a tool that keeps track of my daily word count in different applications.
It might be a vanity metric, but I enjoy seeing my previous day’s word count and looking up today’s word count too. As a writer, it’s good to know that I managed to write some words each and every day, and as a dabbler in data science and data visualization, it’s a cool data point to explore.
I even created an Alfred Workflow for quick display of your daily writing stats. Download it here.
In case you were wondering, as one friend reviewer asked, which tool do I use the most? In recent months, the time spent in Typora and The Archive is pretty even with a slight edge to Typora, according to my time tracking.
Tracking My Notes and Drafts with Git
The other way I track my writings is I monitor the actual files I use. Since all of the files I use to take notes and write are plaintext files, I decided to leverage Git, a software management tool and tracker, to track all of my writing files. It’s really a pretty simple setup that has a daily script that looks at the changes in all of my writing and project note files, stores it into a repo and records some high-level statistics, like words per day, lines and files changed, and total number of files among others.
NOTE: You can find the bash script code https://github.com/markwk/writing-tracker or read my full write-up here.
Alfred: Mac Automation Tool
Alfred is a powerful Mac automation tool. If you work on a Mac, you should be using Alfred. Alfred provides a faster way to do various things, like simplifying Web Searches and opening specific documents or applications. You can also customize it to search directly to certain sites, like Google Scholar or your local library. There are hundreds of add-on workflows that you integrate different tools and services with Alfred. I describe Alfred as way of bringing command line productivity to the forefront of how you work on Mac.
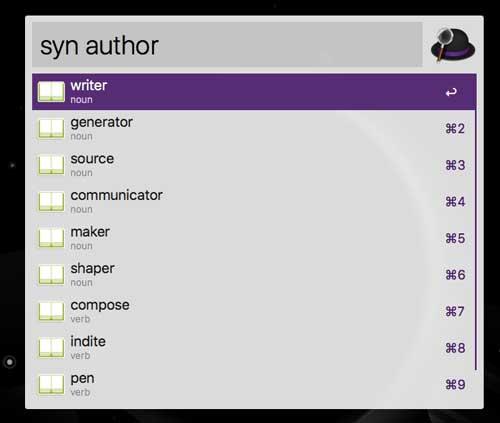
For writing purposes, I use Alfred to make synonyms lookups seamless, custom copy and paste commands, query stock images for designs, and to query my daily word counts from Word Counter without opening up another app. You can use my Alfred Workflow for Wordcounter here.
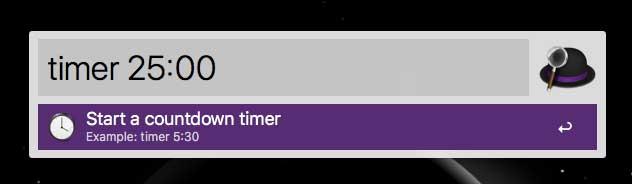
When I’m struggling get going or need a way to simple do a session, I also use Alfred as a simple pomodoro timer. For example, if I want to write for 25 or 35 minutes, before taking a break or walk, it’s a few keystrokes to start a timer like this.
My Key Productivity Tools: Streaks, Todoist, Toggl, and Google Calendar:
I believe most work gets done, because we simply show up and do the work. Writing is not really an act of inspiration or waiting for the muses; it’s an act of sitting down and doing it. The best writers have built up the habit of “showing up and writing,” and they do it consistently.
I strive for the same mindset as a writer. I feel like I continue to grow as a writer through constant repetition and opportunities to express myself.
I use a number of techniques and processes to make sure I stick to my writing habits. When I am a bit off on a routine, I use Streaks app to track my habits. Blocking out time in my calendar to write helps too, and I use Google Calendar to schedule my regular writing times, like I would do any other meeting (except it’s a meeting with just myself). I use Todoist to collect all the various writing tasks I need to do to complete a project and it helps me track my tasks too. Finally, I use Toggl to track my time, including my writing sessions and work as a whole.

All combined these tools ensure I’ve committed habitual time to writing and help me keep track of how and how much I write. The most important thing though is that I commit to writing and carve out time to do it. “Magically,” when I do, words get written, blog posts get published, and chapters in my books advance.
Conclusion: Find Your Tools, But Commit to a Schedule and Focus on the Process
“Writing is thinking. To write well is to think clearly. That’s why it’s so hard.” - David McCullough
I’m passionate about writing. While I’ve managed to complete a lot of writing over the years, I’m still growing as a writer. There are days when the writing goes well, and others where I struggle. Fortunately, I’ve committed to writing as a lifetime activity, and I look at each day as opportunity to show up and put in the time in my craft as a writer.
In this post, we looked at several of my favorite tools for writing. Specifically my favorite two are The Archive and Typora, which are great especially if you are into markdown format. I’ve done a lot of great writing in and with just those two tools.
Beyond those, I use a number of organizational tools that help me stay productive and organized as a writer. For example, I really like my current reference manager, Bookends, and my word count tracker, Word Counter for Mac. They aren’t indispensable, but they sure do improve how I like to write. Additionally I’m a huge fan of Alfred, and a few workflows that make web searches and thesaurus look-ups more seamless as well as pasting file paths as markdown images.
To help me manage my time and writing, I use a number of productivity tools. I believe it’s critical to leverage what you like to manage your time, tasks and calendar. For me, I use and like Google Calendar to schedule weekly blocks of time for writing, I create tasks in Todoist for writing, planning and design work, and I use Toggl to keep track of my weekly writing time. These all are provide consistent reinforce to my habit of writing. While it’s low-tech, each week I try to set one writing goal and score it along with my other weekly goals.
In the end, I encourage you to find your tools as a writer, but don’t procrastinate too much on tools at the expense of avoiding the act of writing. Don’t fall into a trap of thinking there is a better tool or process out-there and wasting away your writing time searching and getting setup. Ultimately what matters most is committing to writing. The best writers have managed to create even before we had computers. Their secret: showing up and writing. So, focusing on the process and keep writing.
Good luck and happy writing!